Free Private ADS Blocker
A tutorial on how to install a private ads blocker server with AdGuard Home on Oracle Cloud and Ubuntu ... all for free ...
The Server
STEP 1: Create the virtual server on Oracle
As a very first need to create the OCI (Oracle Cloud Infrastructure) instance. The oracle is giving as "always free":
- Arm-based Ampere A1 cores and 24 GB of memory usable as 1 VM or up to 4 VMs
- AMD Compute Instance: AMD based Compute VMs with 1/8 OCPU and 1 GB memory each / 2 AMD based compute VMs
- .... and many more ... see here --> oracle.com/cloud/free/
In this tutorial, we will need to use just one AMD based Compute VM with shape called "VM.Standard.E2.1.Micro".
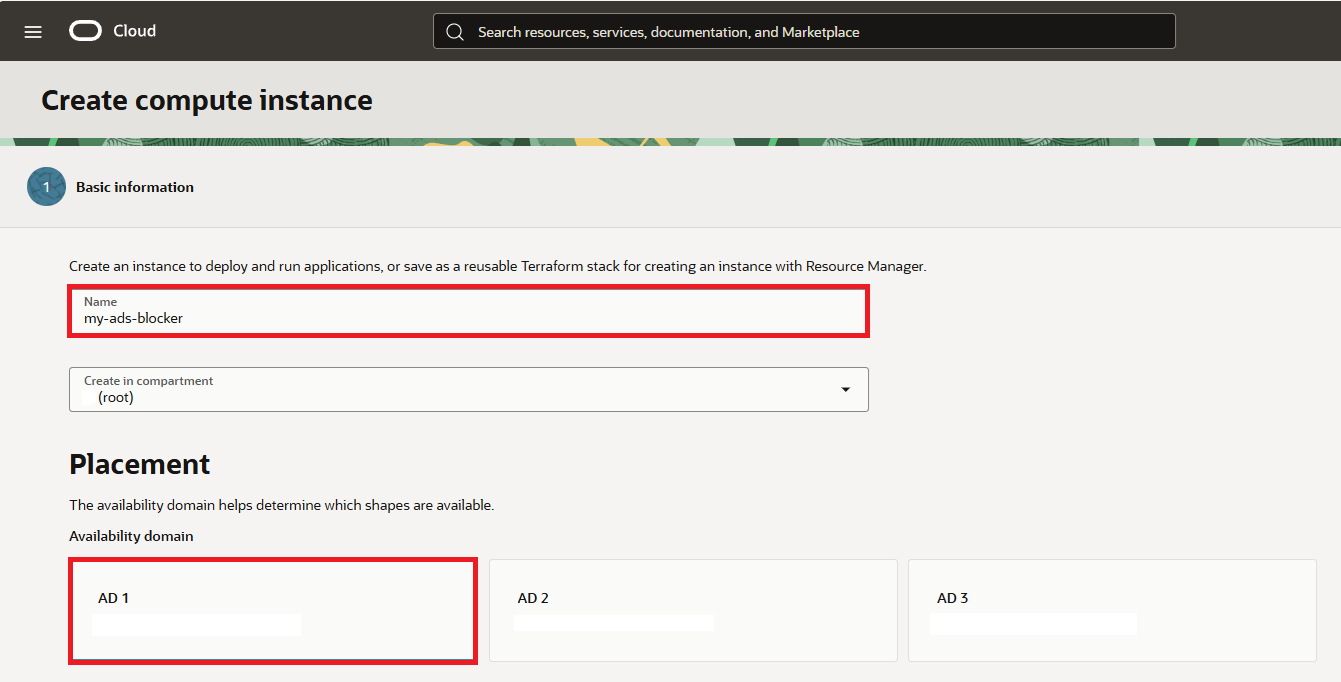
Open compute instances page and click on "Create Instance".
Type your preffered "Name" and select "Placement" option.
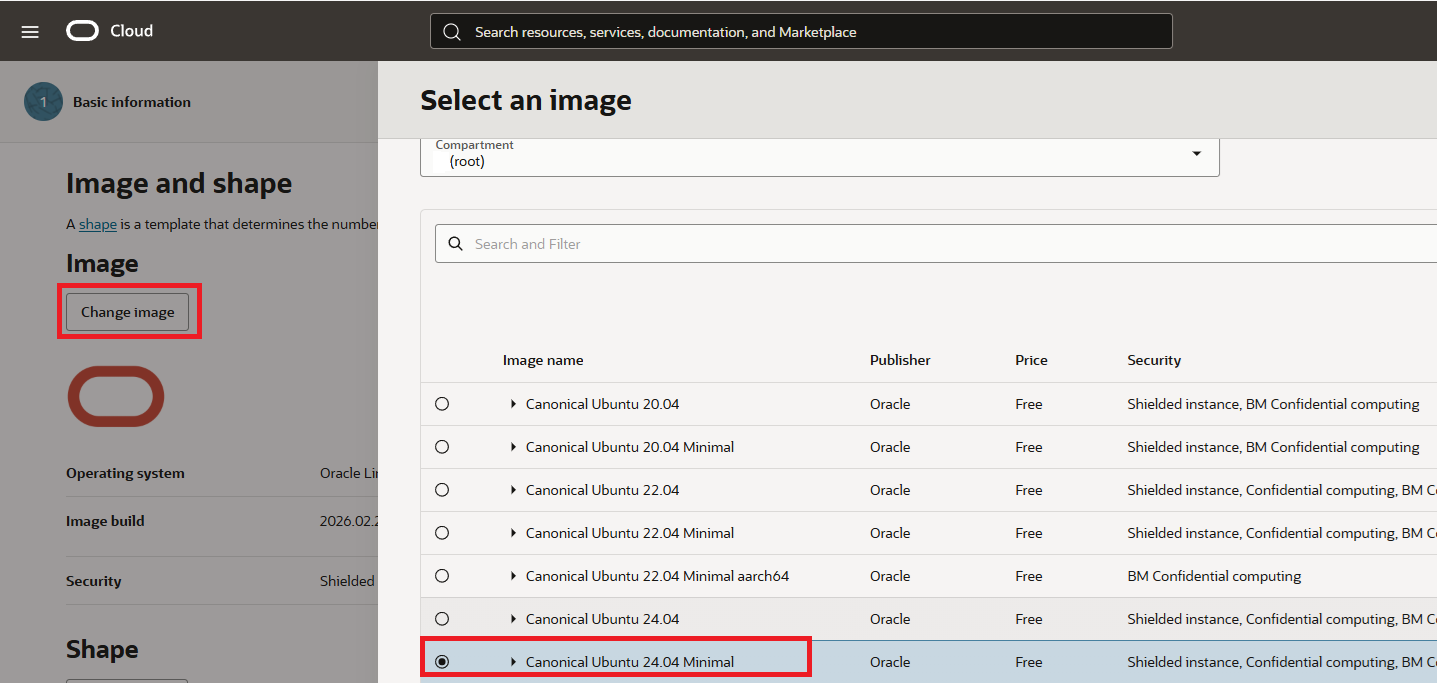
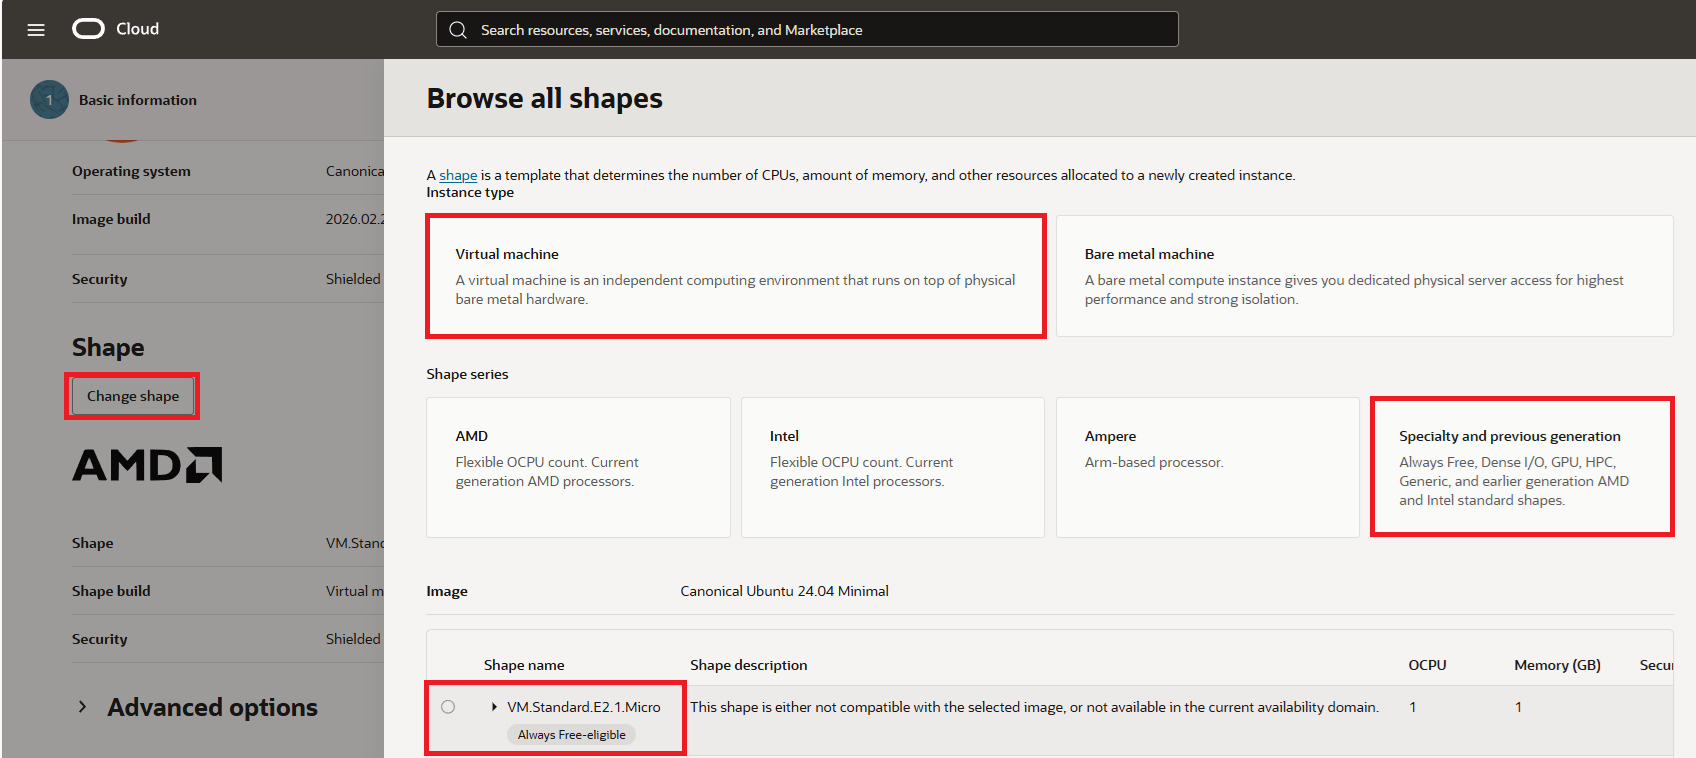
Then click on shape and select "Canonical Ubuntu 24.04 Minimal"
Next select "Virtual Machine", "Specialty and previous generation" and "VM.Standard.E2.1.Micro"
Then click on Next button to see Security options. Keep them as they are.
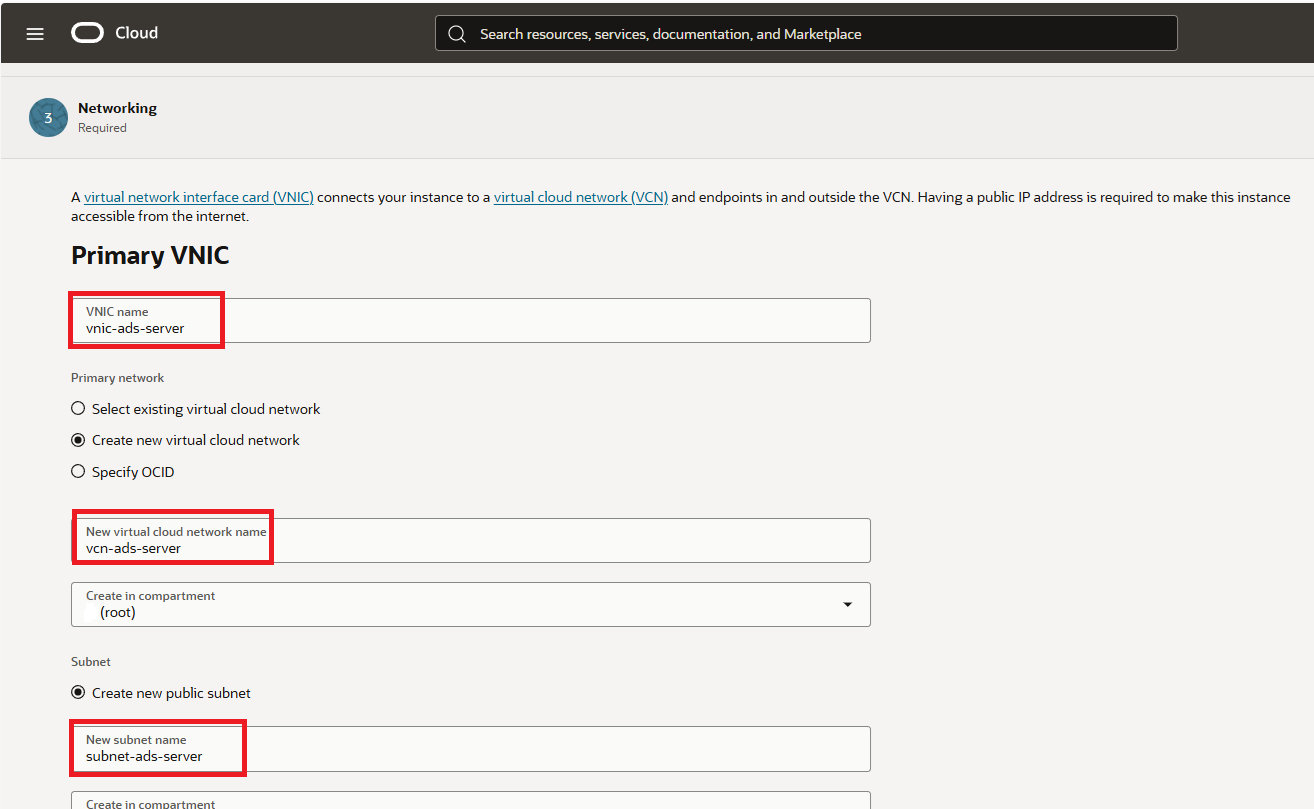
Click again next and on Networking tab setup "Primary VNIC" name, "virtual cloud network" and "subnet" name as you wish.
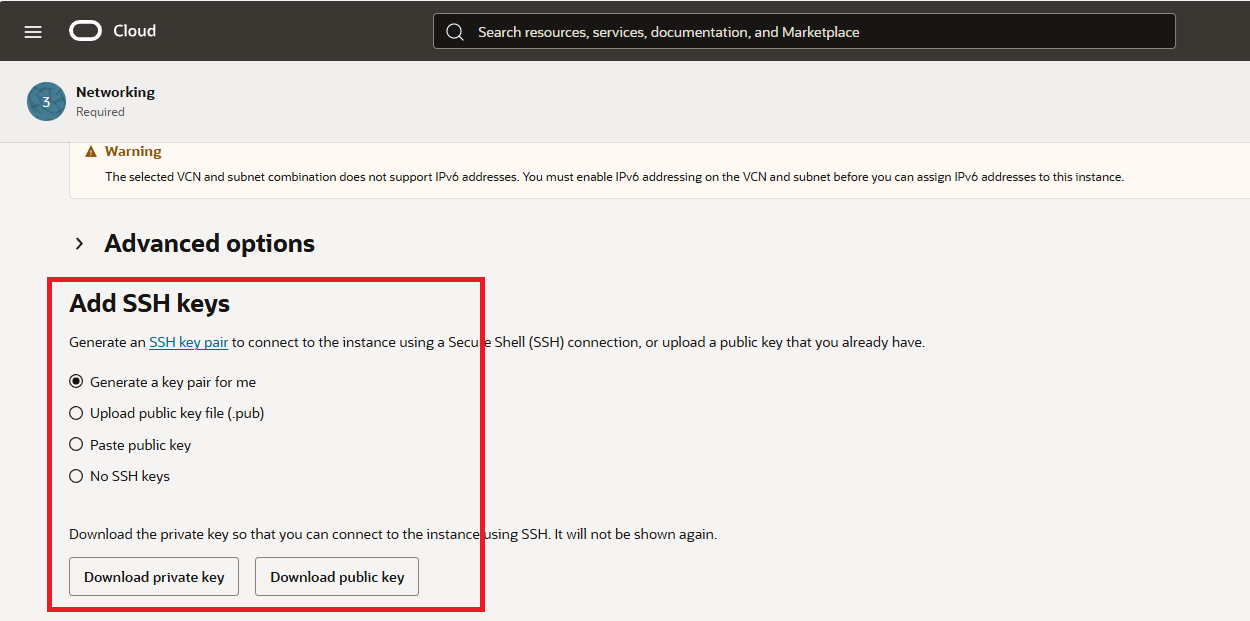
At the very bottom of the Security tab, either keep "Generate a key pair for me" or upload your exiting keys.
For the storage I kept everything as is. So you can click "Next" to review your setup and click "Create" button to create your instance.
You will be then presented with compute instance just created in few minutes. Voila!

STEP 2: Configure VCN Security List
In this step we need to open ports so we can connect to our virtual machine and we will do it by editing the default security list of our VCN in Oracle panel.
Open https://cloud.oracle.com/networking/vcns
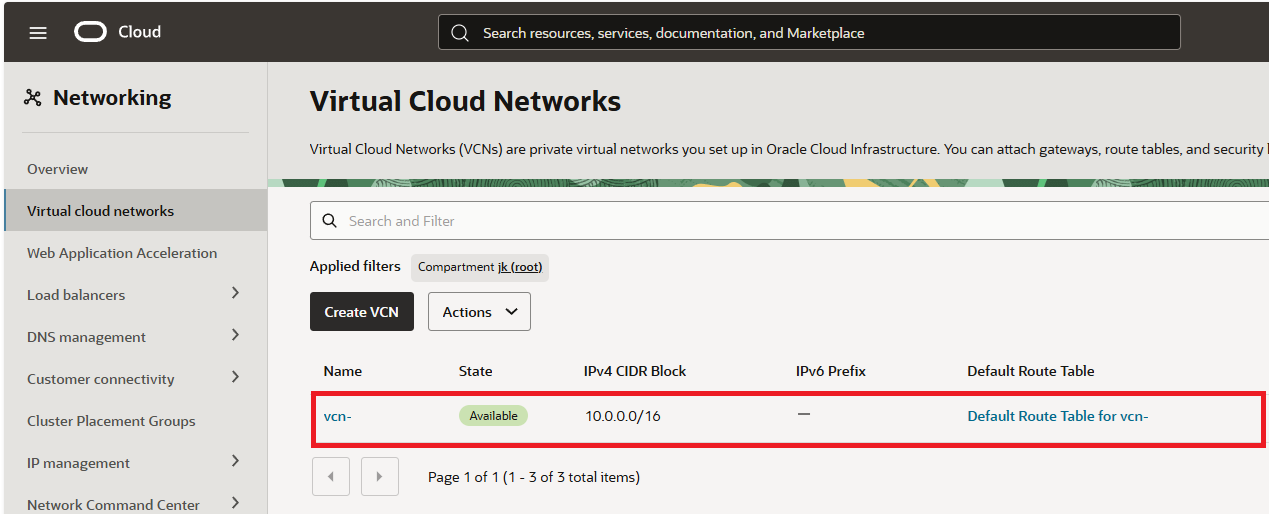
Once there open "Security" tab and click on "Default security List" of the VCN.
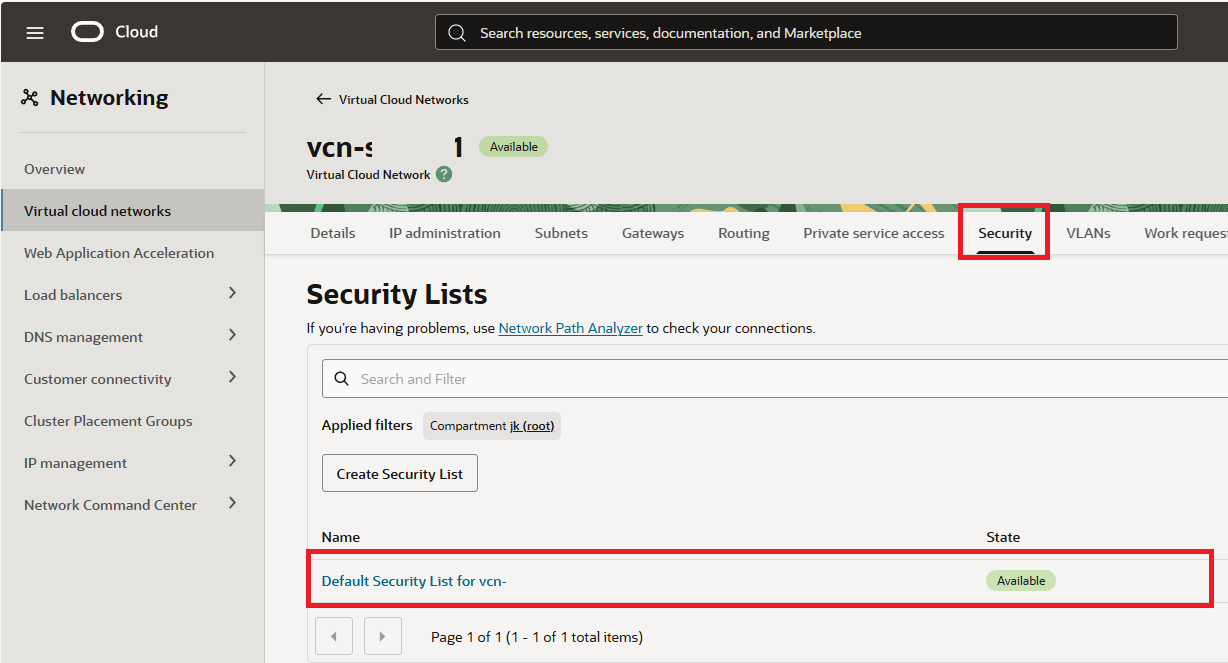
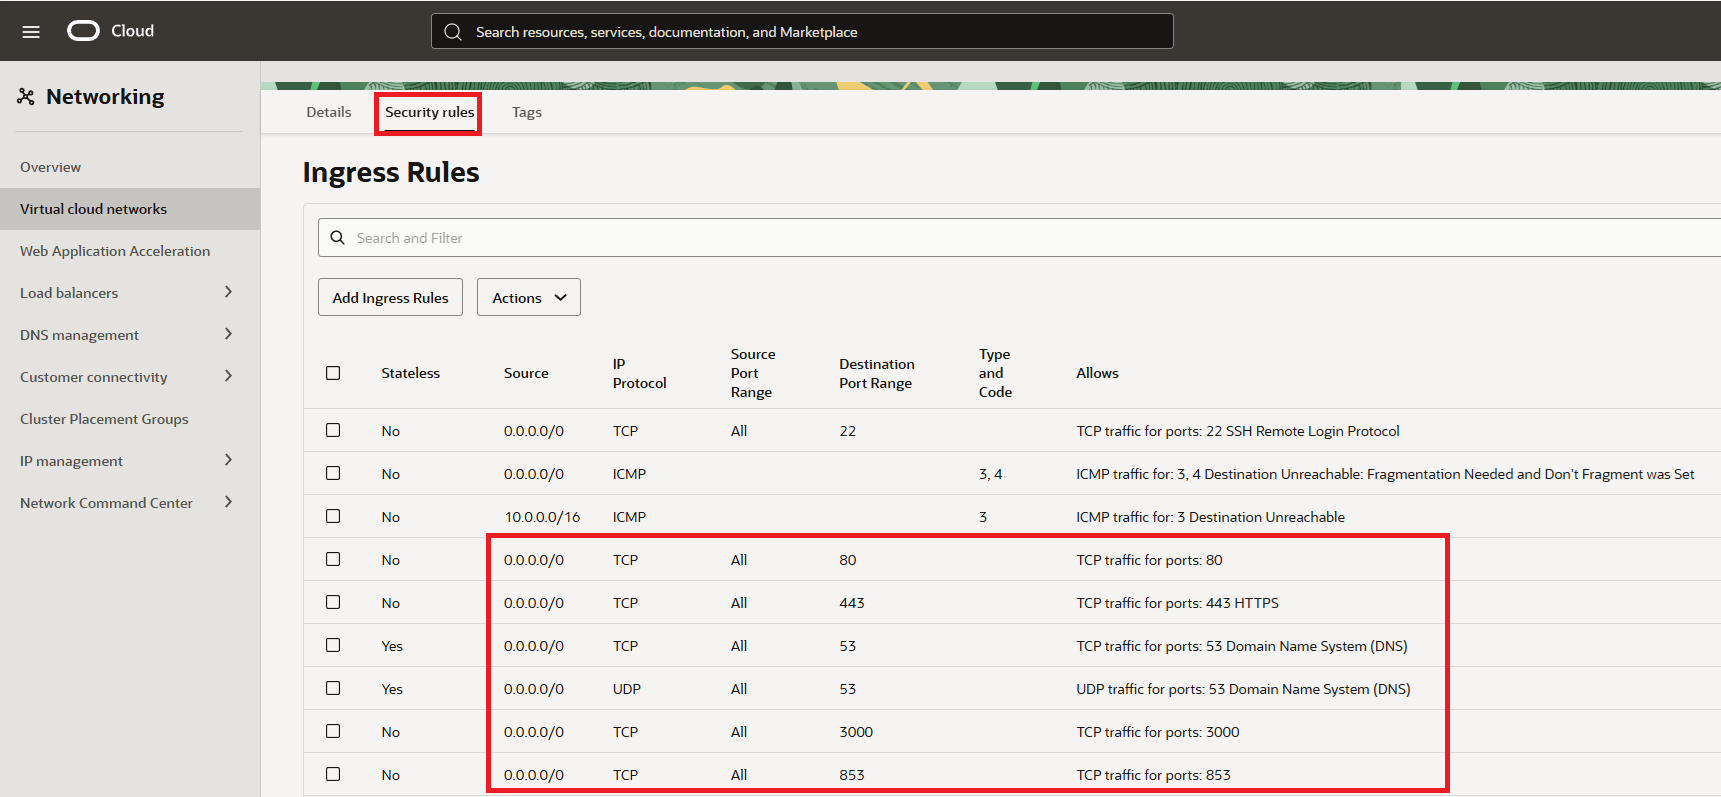
In the "Default Security List for vcn" click on "Security rules" and add below.
Ingress Rules:
- port "80" for http
- port "443" for https
- ports "53" for TCP and also for UDP
- port "3000" for intial setup - once setup - can be removed
- port "853" for mobile connection
- port "22" for SSH is already present - no need to add
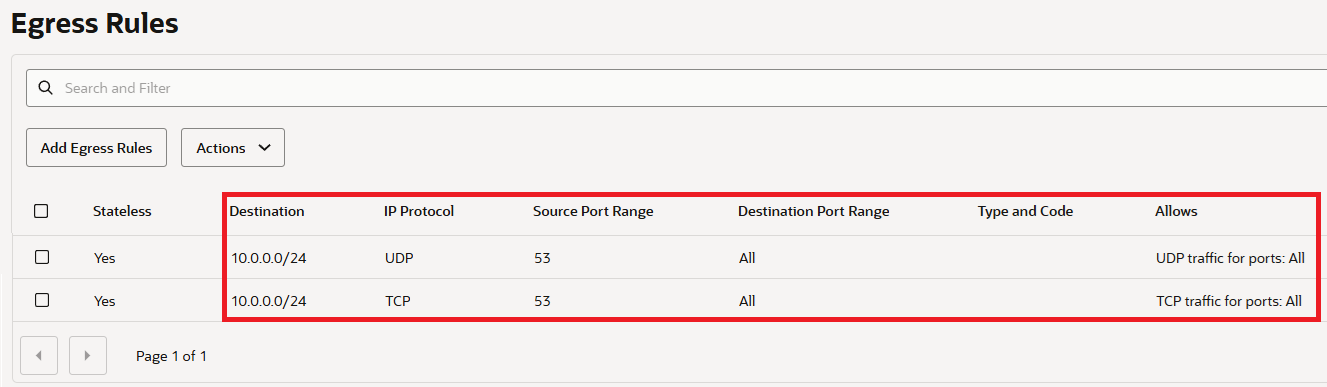
Egress Rules:
- ports "53" for TCP and also for UDP
STEP 3: Set Up the Server
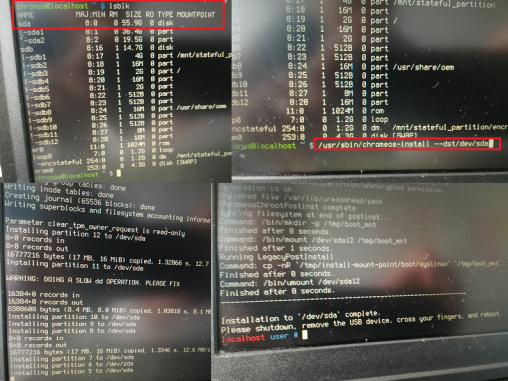
SSH into your server. The default username is “ubuntu” and there is no passwd set. You will need to use the SSH keys you setup earlier. When logged in as a first we need to make it up to date. Execute code:
sudo apt update && sudo apt upgrade -ysudo nano /etc/iptables/rules.v4:INPUT ACCEPT [0:0]
:FORWARD ACCEPT [0:0]
:OUTPUT ACCEPT [463:49013]
:InstanceServices - [0:0]
-A INPUT -m state --state RELATED,ESTABLISHED -j ACCEPT
-A INPUT -p icmp -j ACCEPT
-A INPUT -i lo -j ACCEPT
-A INPUT -p udp --sport 123 -j ACCEPT
-A INPUT -p tcp --dport 53 -j ACCEPT
-A INPUT -p udp --dport 53 -j ACCEPT
-A INPUT -p tcp -m state --state NEW -m tcp --dport 80 -j ACCEPT
-A INPUT -p tcp -m state --state NEW -m tcp --dport 443 -j ACCEPT
-A INPUT -p tcp -m state --state NEW -m tcp --dport 853 -j ACCEPT
-A INPUT -p tcp -m state --state NEW -m tcp --dport 3000 -j ACCEPT
-A INPUT -p tcp -m state --state NEW -m tcp --dport 22 -j ACCEPT
-A INPUT -j REJECT --reject-with icmp-host-prohibited
-A FORWARD -j REJECT --reject-with icmp-host-prohibited
-A OUTPUT -d 169.254.0.0/16 -j InstanceServices
sudo rebootThe software
STEP 1: Install Adguard
After the server is up and running we will connect again via SSH and start the adguard installer:
curl -s -S -L https://raw.githubusercontent.com/AdguardTeam/AdGuardHome/master/scripts/install.sh | sh -s -- -vSTEP 2: Fix Bind: address already in use
There is a known issue in Ubuntu linux, therefore you will see an error on step 2:
"validating ports: listen tcp 0.0.0.0:53: bind: address already in use"
so we need to fix it. Execute code below:
sudo mkdir -p /etc/systemd/resolved.conf.d
sudo nano /etc/systemd/resolved.conf.d/adguardhome.conf[Resolve]
DNS=127.0.0.1
DNSStubListener=nosudo mv /etc/resolv.conf /etc/resolv.conf.backup
sudo ln -s /run/systemd/resolve/resolv.conf /etc/resolv.conf
sudo systemctl reload-or-restart systemd-resolvedSTEP 3: Install Certbot on Ubuntu
As a prerequesite you need to have your own domain, poiting to your server. You can order your own domain in any registrants, just setup the "A" record poiting to your server ip address:

If A record is setup we will ensure that we have up to date package repositories to ensure you're installing the latest version of certbot. Execute below:
sudo apt updatesudo apt install -y certbotcertbot certonly --manual --preferred-challenges=dns --email no-reply@domain.tld --server https://acme-v02.api.letsencrypt.org/directory --agree-tos -d domain.tld -d *.domain.tld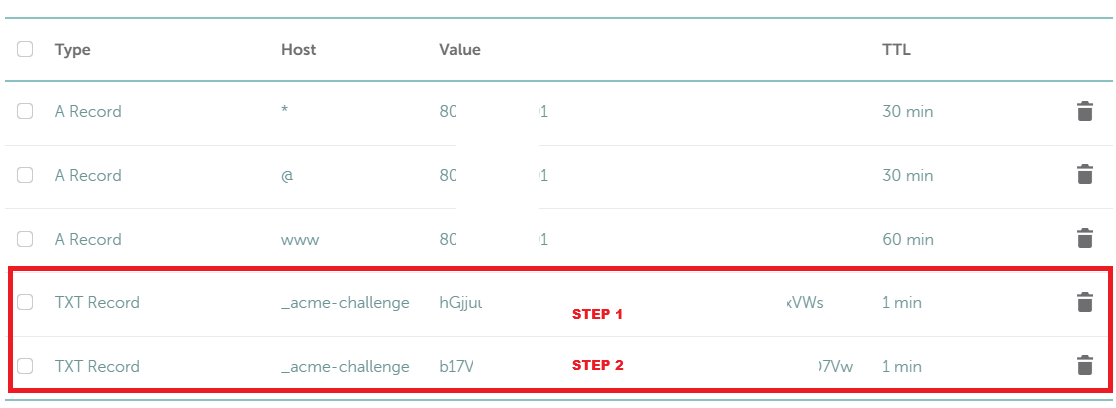 You can verify records (before clicking continue) on:
https://toolbox.googleapps.com/apps/dig/#TXT/_acme-challenge.domain.tld.STEP 4: Setup Adguard to use secured connection
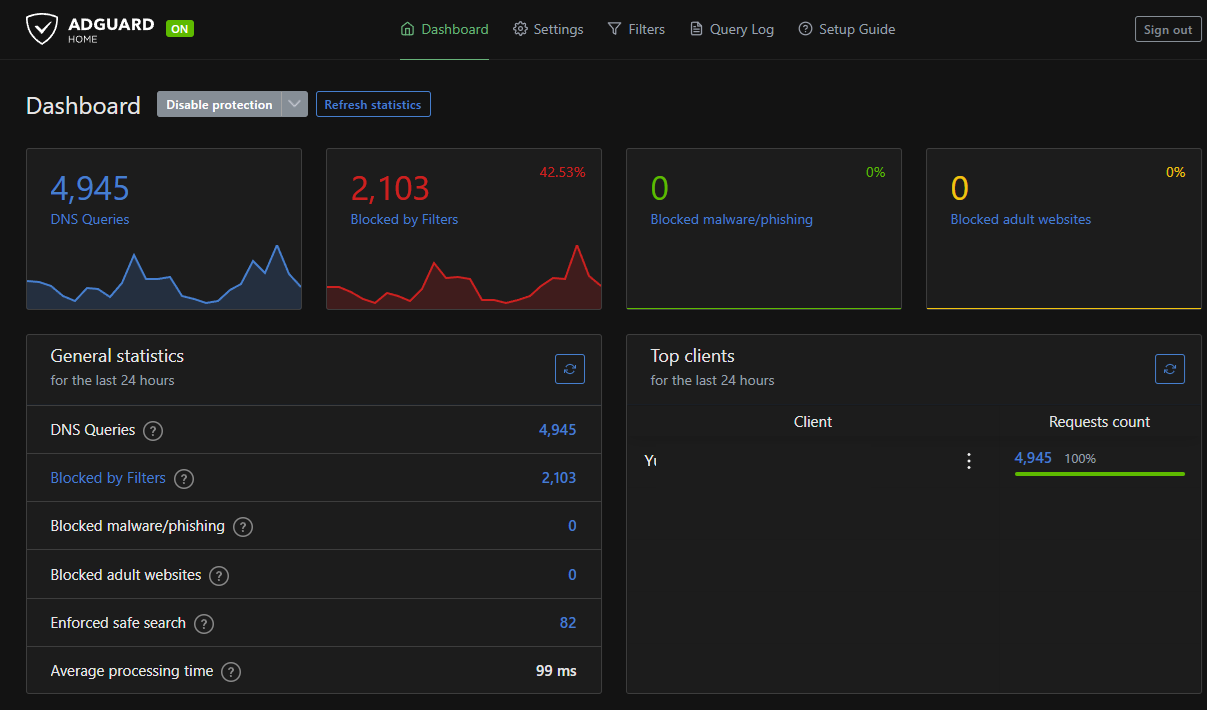
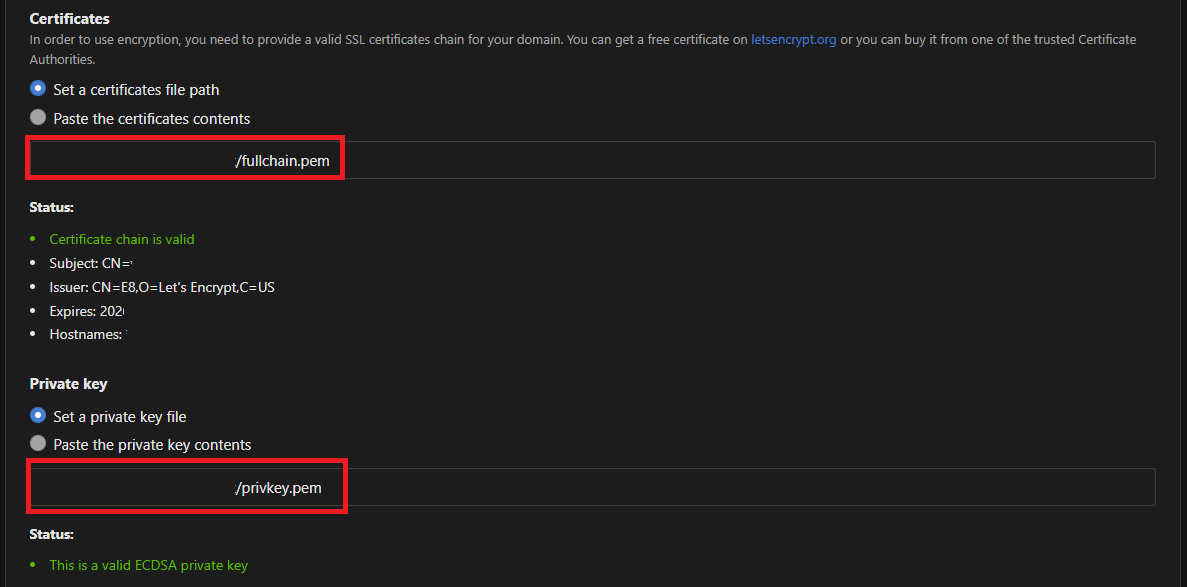
The last step is to secure your Adguard. Login to adguard and from the dashboard - go to "Settings" --> "Encryption settings" and setup below:
- Tick "Enable Encryption (HTTPS, DNS-over-HTTPS, and DNS-over-TLS)"
- Specify your domain (domain.tld) in "Server name" field
- Untick "Redirect to HTTPS automatically"
- HTTPS port "443"
- DNS-over-TLS port & DNS-over-QUIC port keep on "853"
- Set a certificates file path
- Set a private key file
 Aaaand test it!
Resources/other sites
oracle.com/cloudadguard.com
How To Install Certbot on Ubuntu 24.04