Hi there, this DYI is about Raspberry Pi in “ALL-IN-ONE” box.
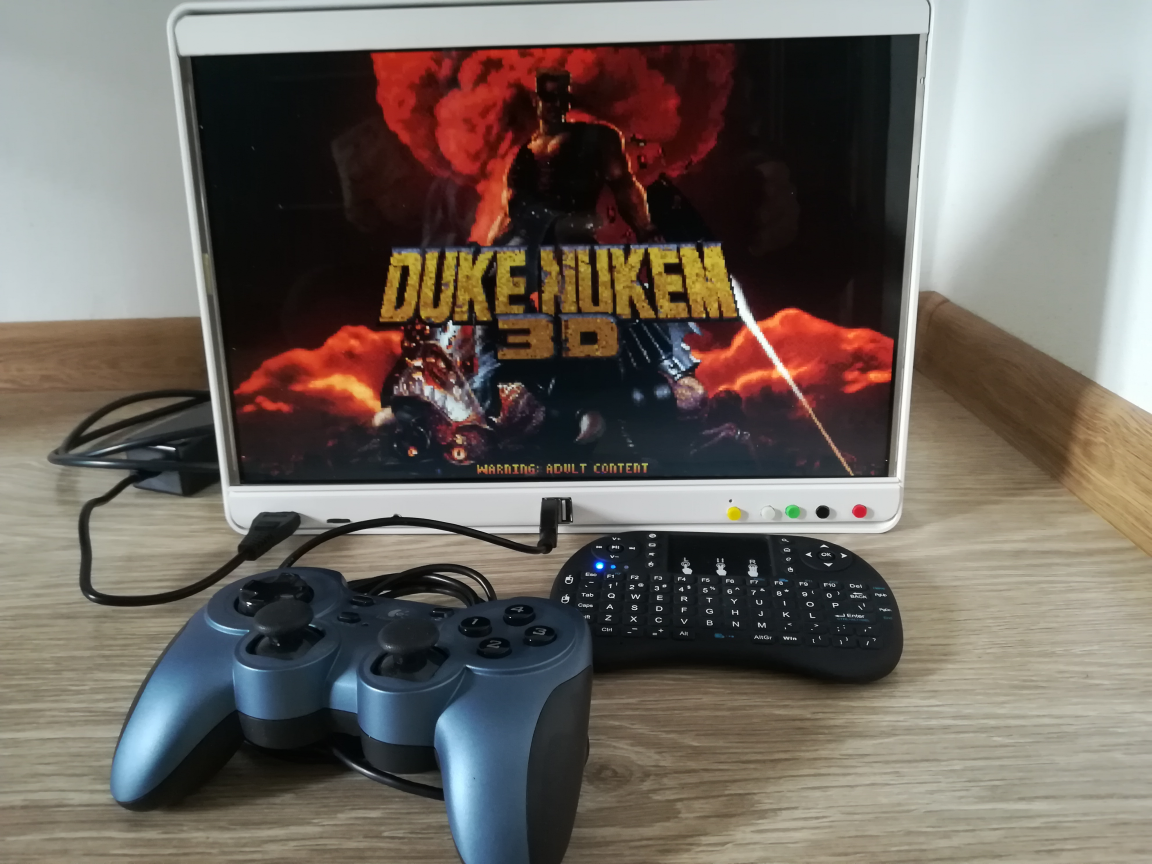
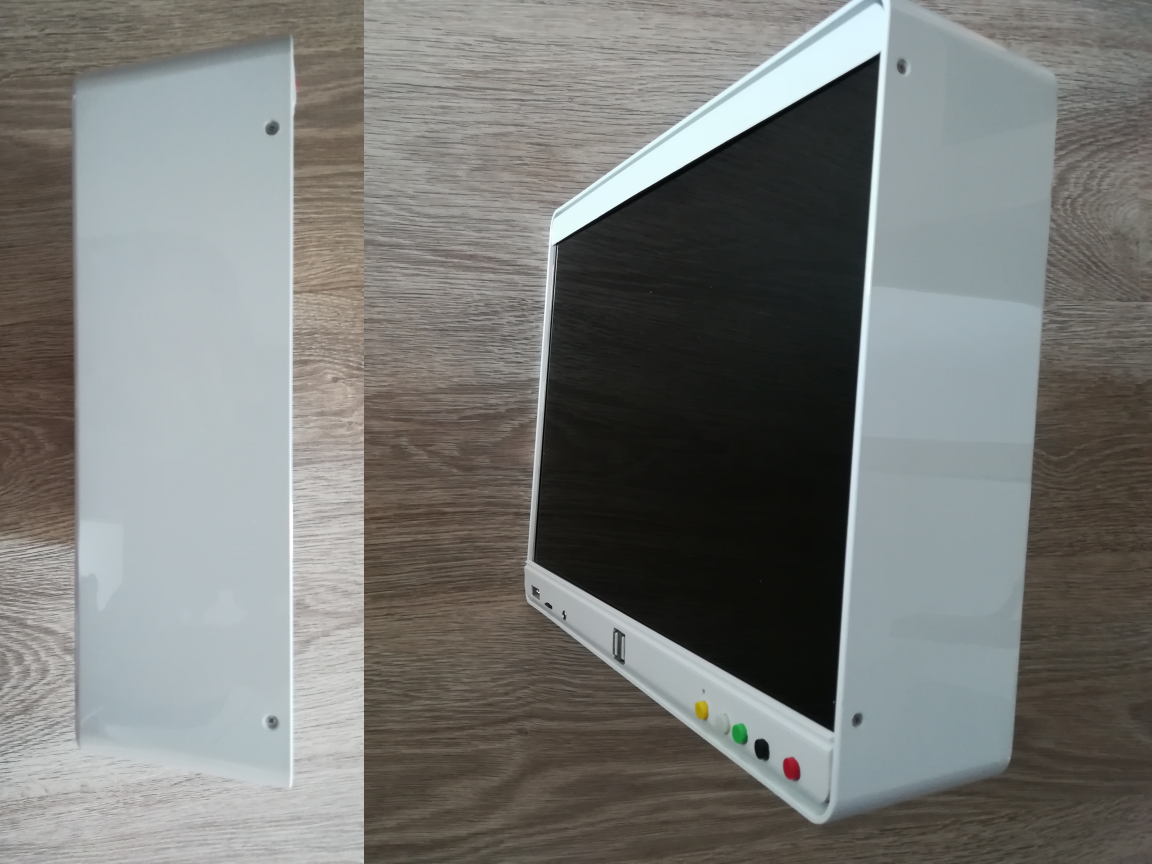
FINAL PRODUCT:
PARTS:
– Raspberry Pi 2 – lying at home (now you can order other/better version) [€42,90] — OR — buy
– Wifi dongle – ASUS USB-N10 Nano – [€9,90] – local store — OR — buy similar
– MicroSD card, 16GB – [€9,59] – local store — OR — buy similar
– 25CM TF to micro SD card Flex Extension cable Extender Adapter – [€2,63] – buy
– Wireless Mini Keyboard – [€6,83] – buy — OR — use any USB standard keyboard
– Samsung LTN154X3-L01 15.4″ Laptop LCD Screen – lying at home — OR — [€21,72] – buy
– Controller Board + Backlight Inverter + 30P Lvds Cable + Remote – [€35,21] – buy
– Plastic Box – KUGGIS IKEA (26 x 35 x 8 cm) – [€5,99] – buy
– Chopping board (24.5 x 17.3 cm) – [€1,89] – local store
– 2 Ch Digital Stereo Audio 5V Amplifier 3W*2 (PAM8403) – [€1,09] – buy
– Speakers – lying at home
– Power Supply 12V+5V 2A AC Adapter – [€2,88] – buy
– DC Power Male Jack Connector – local store — OR — buy
– Micro USB male – [€0,70] local store — OR — buy
– 2x USB Male Connector – [2x 0,90€] – local store — OR — buy
– Dual USB Female Connector – [0,90€] – local store — OR — buy
– Plastic screws M2/M3 Male Female Nylon Screws Kit – buy
– Plastic electrical wire molding (used for top & bottom panels) – [€1,24] – local store
Still on my TODO list (optional):
– power, reset buttons & leds – from old PC — OR — [€0,99] – buy
– 50mm 12v CPU Fan – was lying at home OR 80mm fan – [€1,41] – buy
Total prize: €155,66
Notes:
– The price above showing the totals if you don’t have anything lying at home
– Prices may differ, above showing the prices in the time of my order
TOOLS
– screwdriver
– razor blade
– drilling machine + drills
– hot glue gun + glue
HOW TO
STEP 1: TEST ALL PARTS + LOAD IMAGE
Before you will start with anything related to this DIY, I would like to recommend you to connect all parts somewhere on wooden table or so, and test if all works as expected.
RetroPie Image for the SD card
RetroPie First-Installation
RetroPie Supported systems
STEP 2: DESIGN HOLDER – CHOPPING BOARD
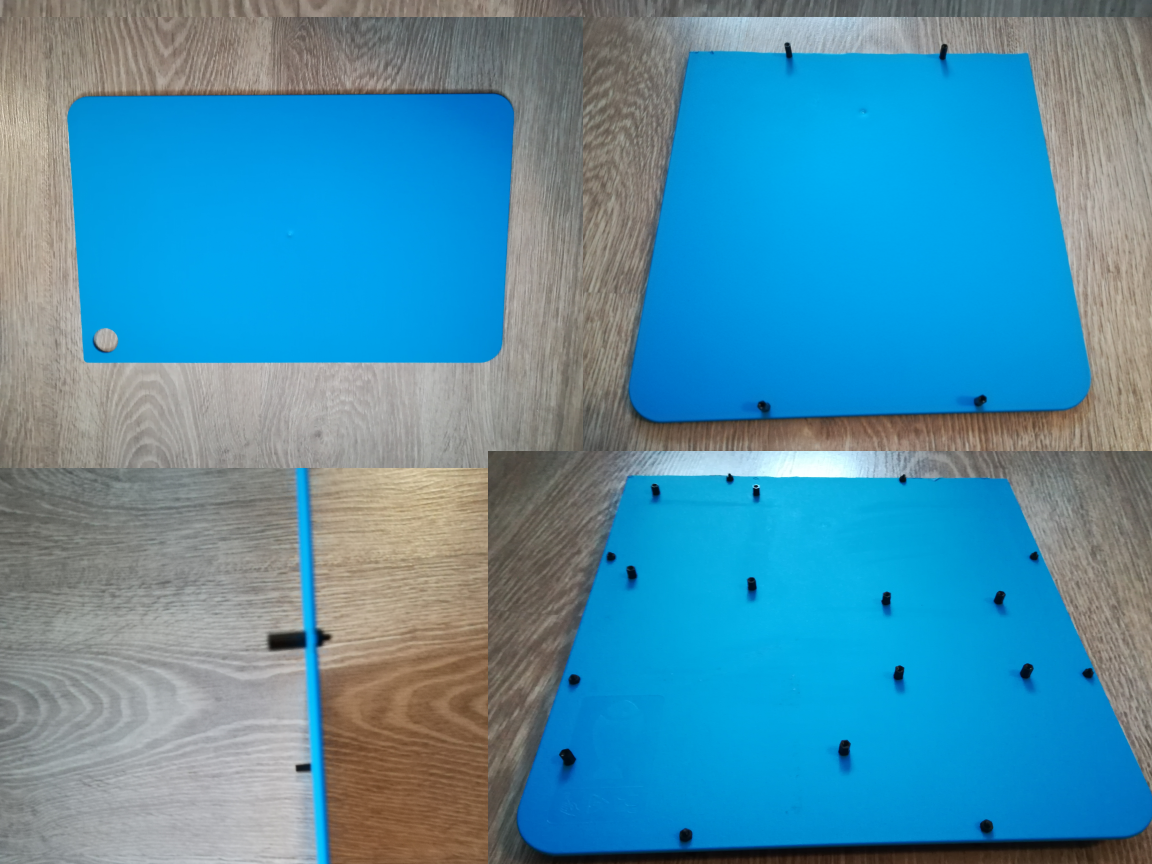
First I was thinking how to fix all in place inside the machine without big hurts. I’ve chosen the plastic chopping board, which will be fixed to the monitor and will hold all the needed. So measured and measured, then drill holes and attach the screws.
STEP 3: ADD ALL PARTS TO THE BACK OF MONITOR
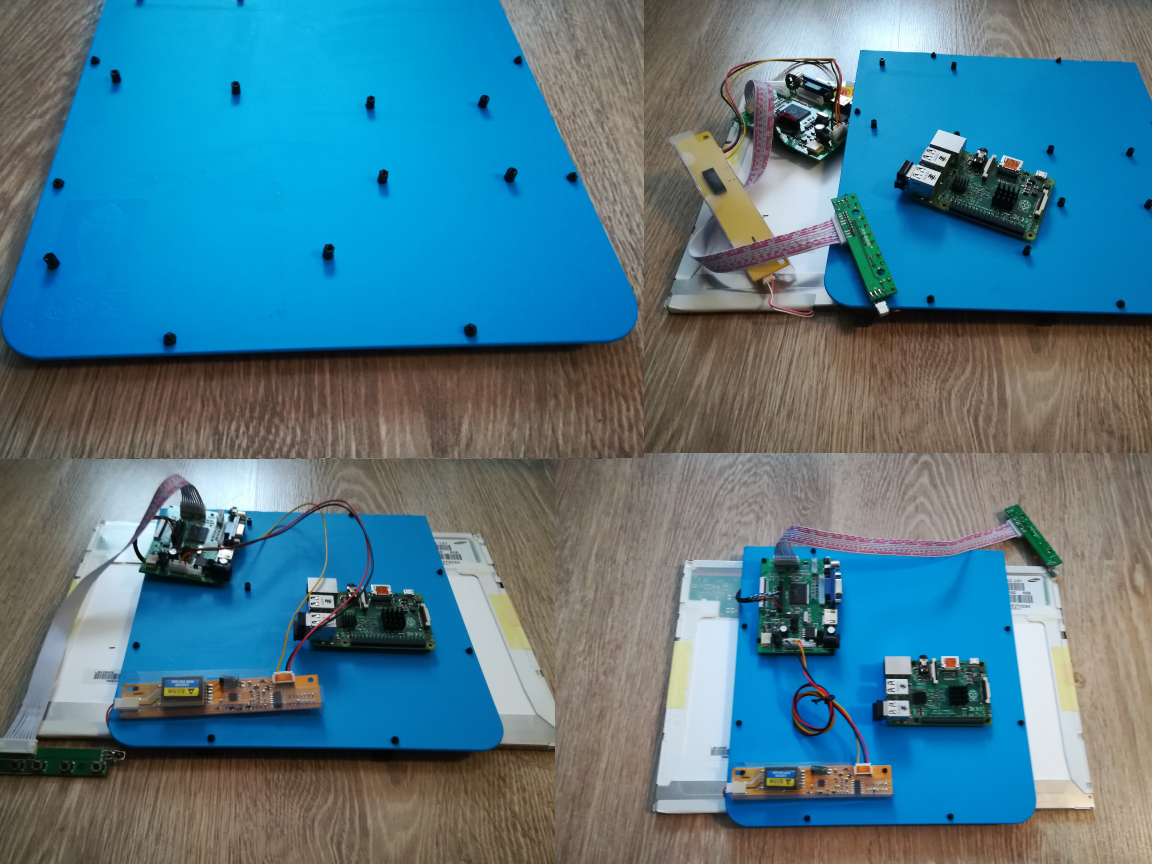
Once screws are in place I’ve started will attaching all in place.
STEP 4: TOP PANEL
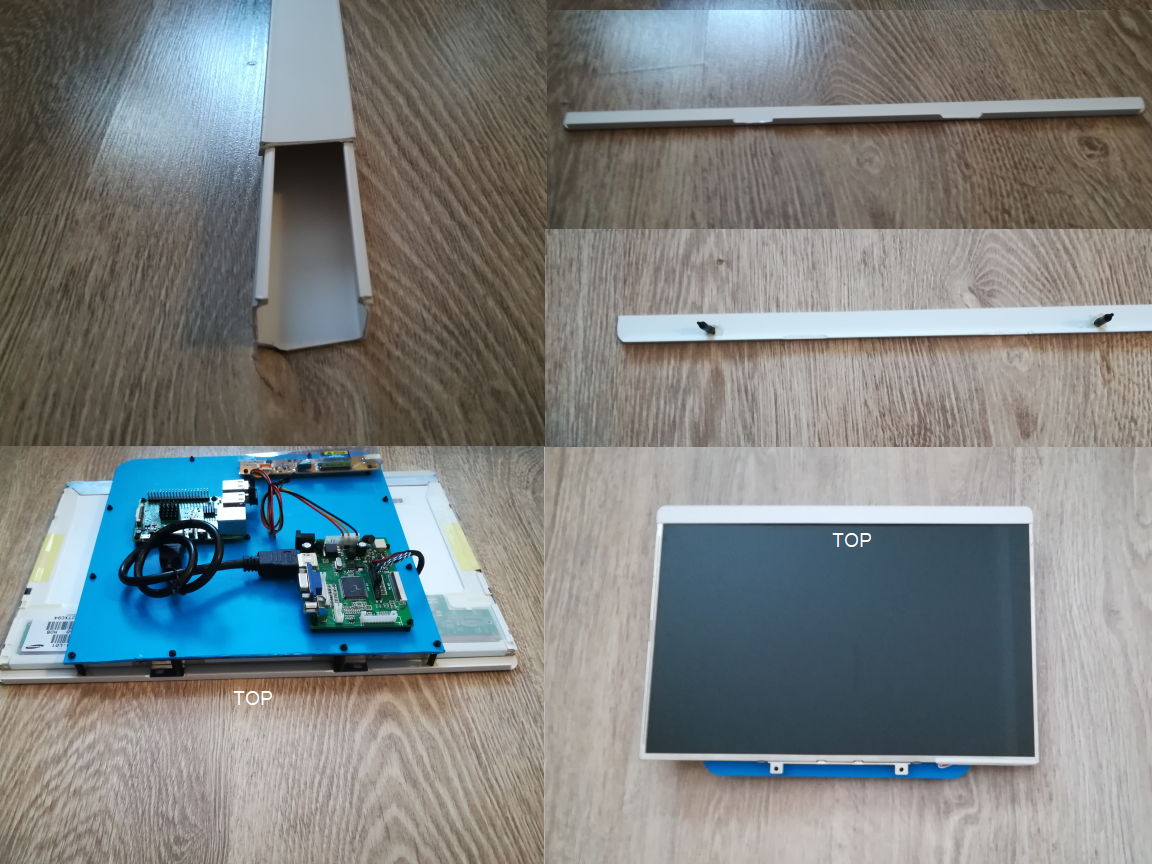
Top panel was the easiest on the whole machine. I’ve just took the plastic screws and glue it on the cut panel from electrical wire molding.
STEP 5: BOTTOM PANEL


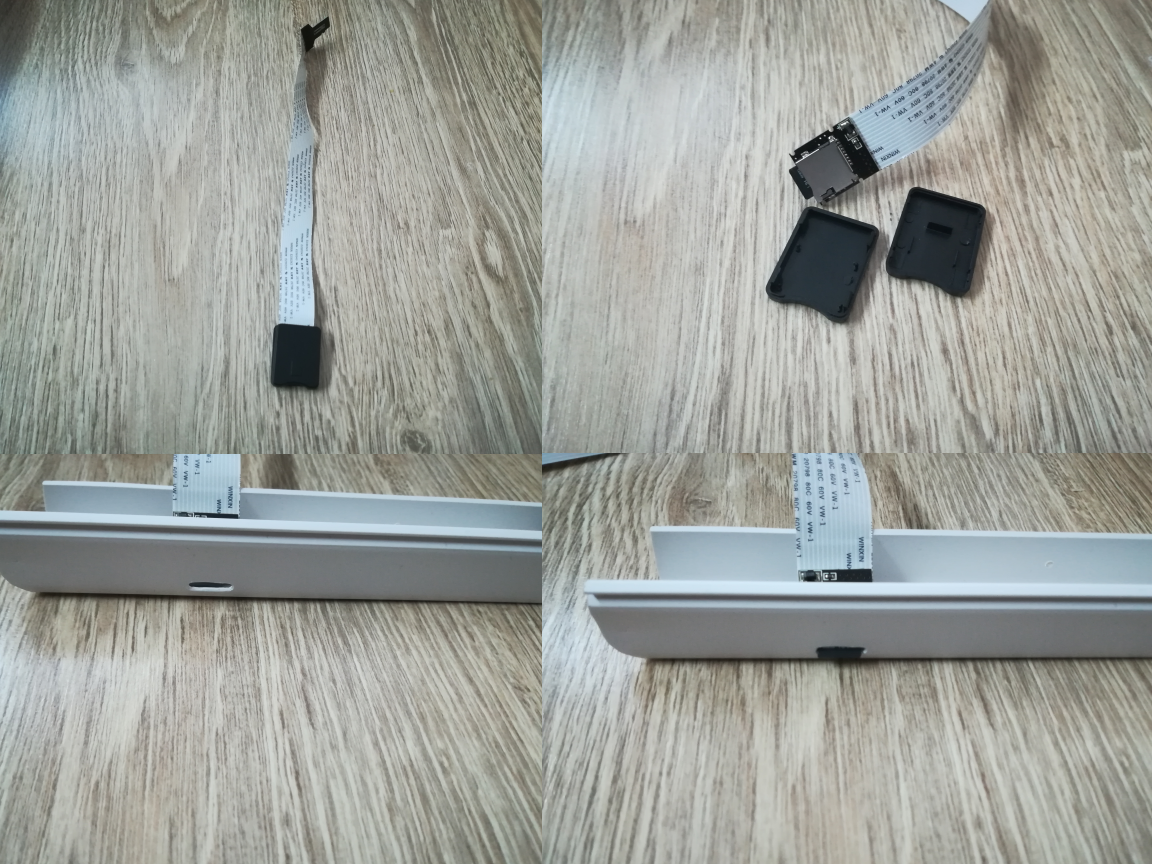
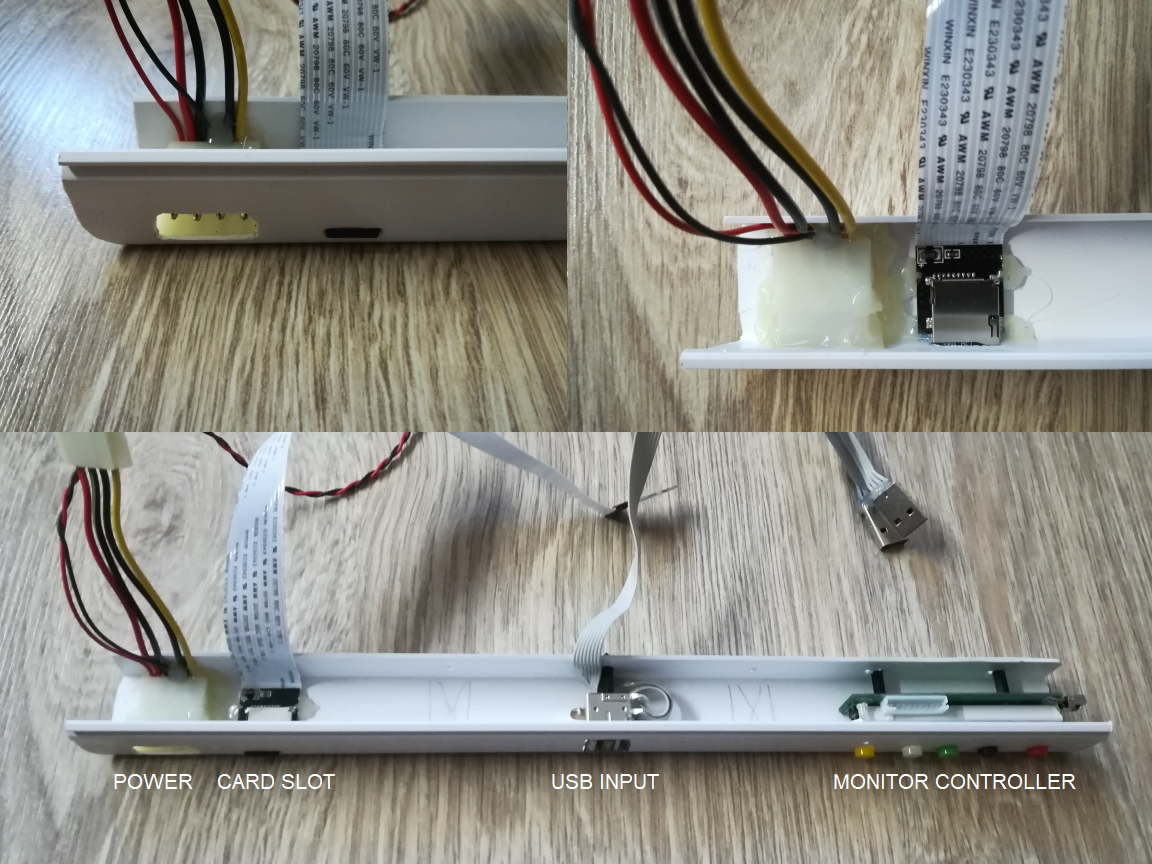
As the opposite, the bottom panel was the hardest part of this project. I need to think carefully were and how to attach power, card slot usb and monitor controller.
STEP 6: BOX
This is the only one drilling needed for the Plastic Box from IKEA.
.. So you can reuse it in a case of you need 🙂 ..
STEP 7: ALL IN ONE – LET’S PLAY!
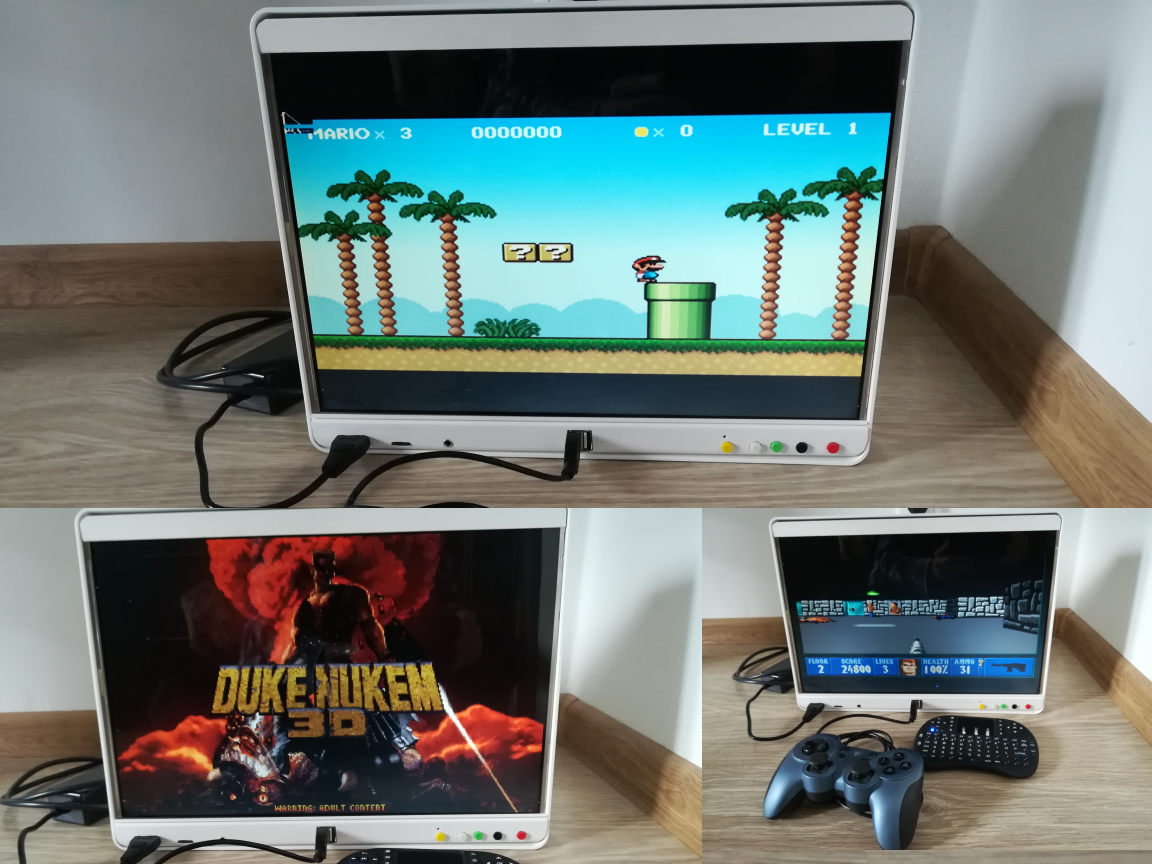
I’ve tested the machine with power and one usb, all works nicely.
STEP 8: OPTIONAL: BUTTONS & FAN
You can optionally add power & reset buttons + some fan to cool the machine. One day I will add it there… You must believe me.