Hi welcome.
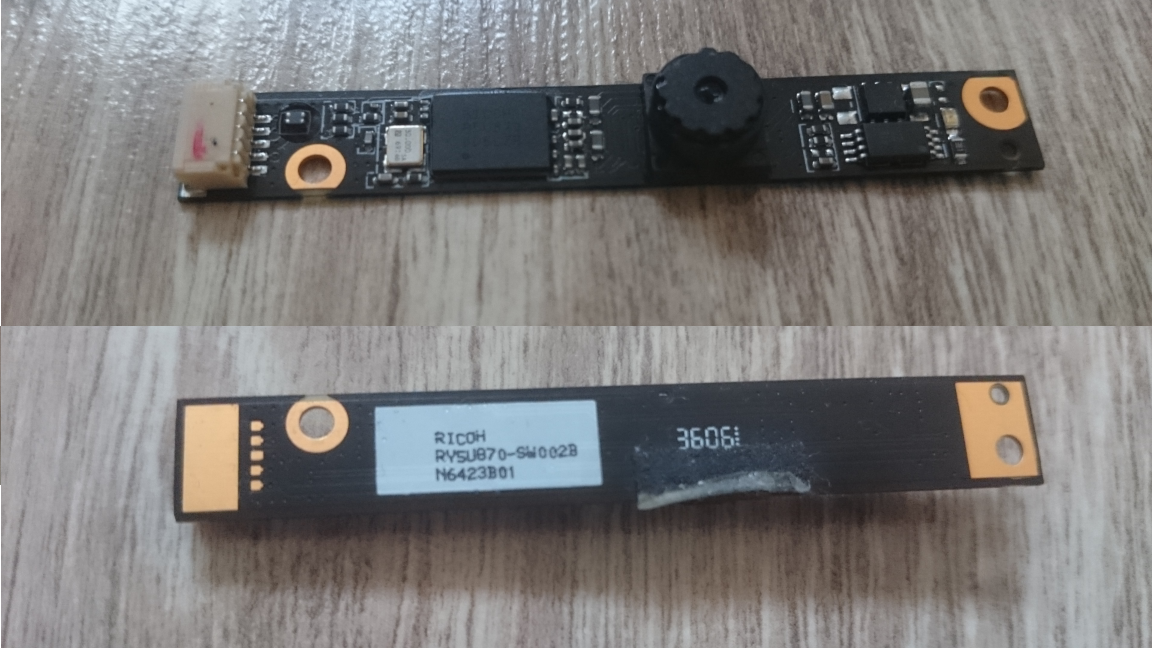
This time I will show you how to reuse and old laptop camera and make an external USB webcam. Mine was taken from very old laptop – HP Pavilion DV6 something – Ricoh RY5U870.
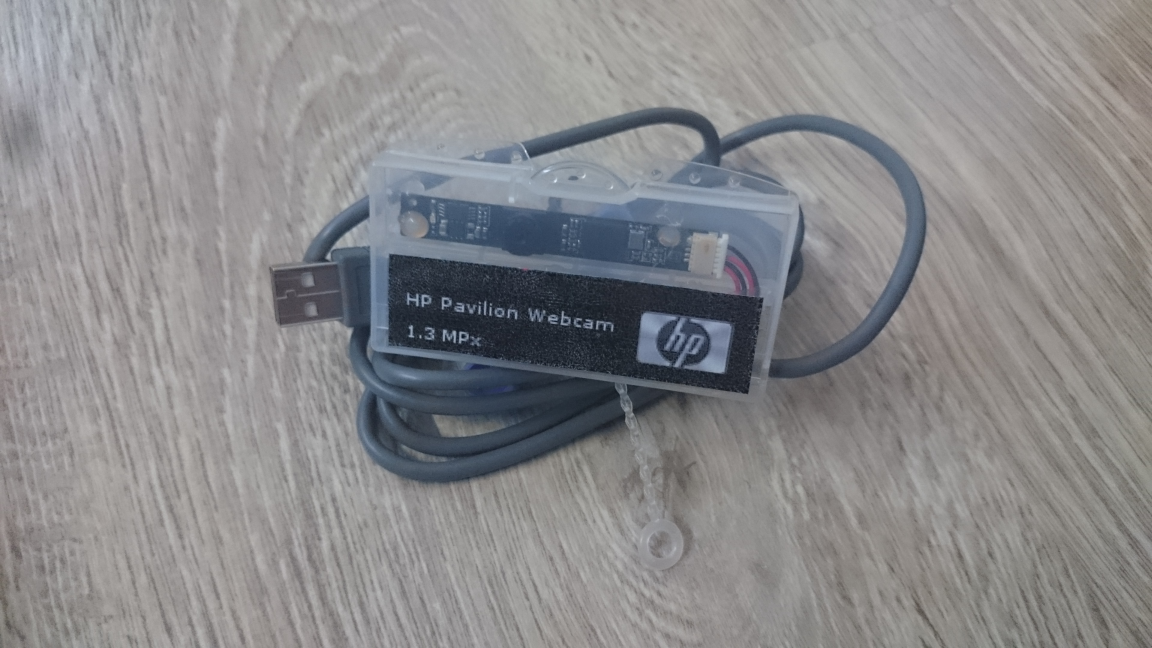
FINAL PRODUCT
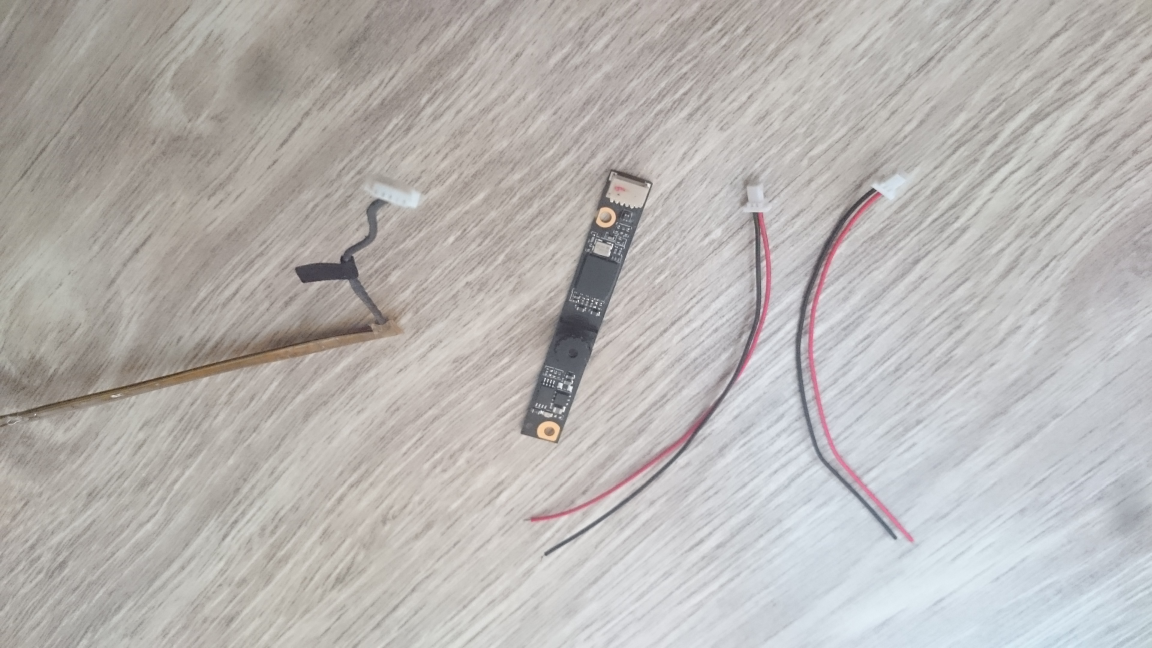
PARTS
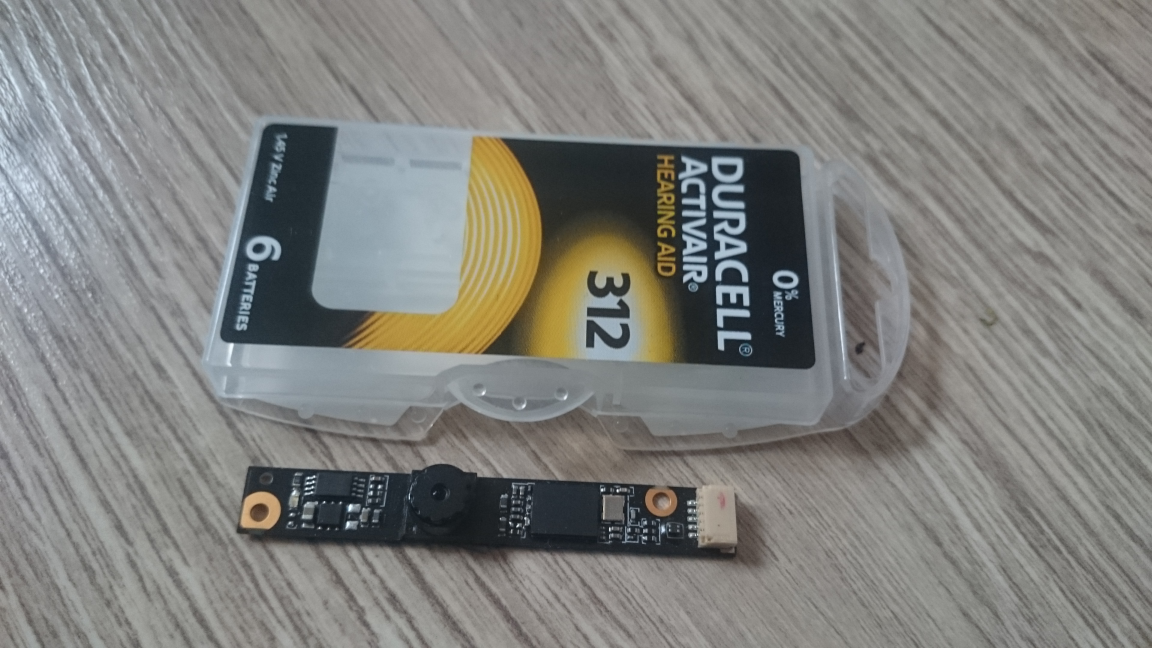
1. camera
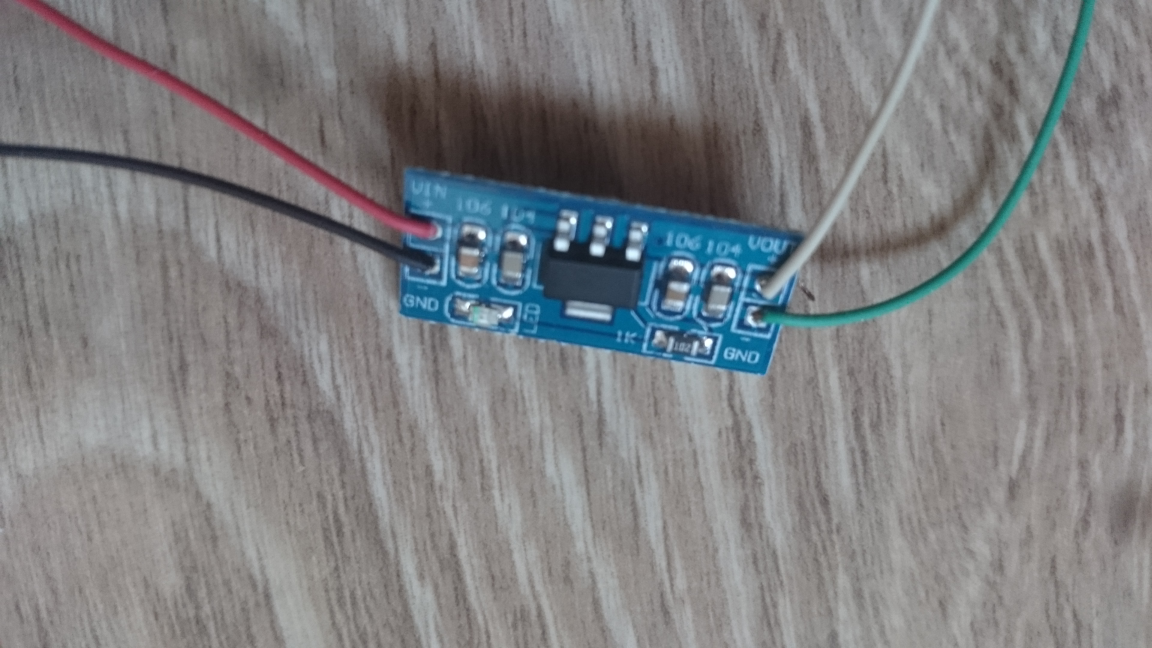
2. step down power supply module – AMS1117-3.3V – [€1.29] – local store OR [€0.40] – buy
3. plastic connector from old webcam cable
4. new set of cables – Mini Micro SH 1.0 2-Pin JST Connector with Wires – [€0.74] – buy
5. old USB cable Type A, or buy a new one, around €1 – local store
6. some fancy plastic box – €0.75 – local store
Total prize: €2,89
Notes:
– The price above showing the totals if you don’t have anything lying at home
– Prices may differ, above showing the prices in the time of my order
HOW TO
STEP 1: THE CAMERA
Tools:
– Screwdriver
Open the laptop screen, if not done so and unscrew/pull out the webcam.
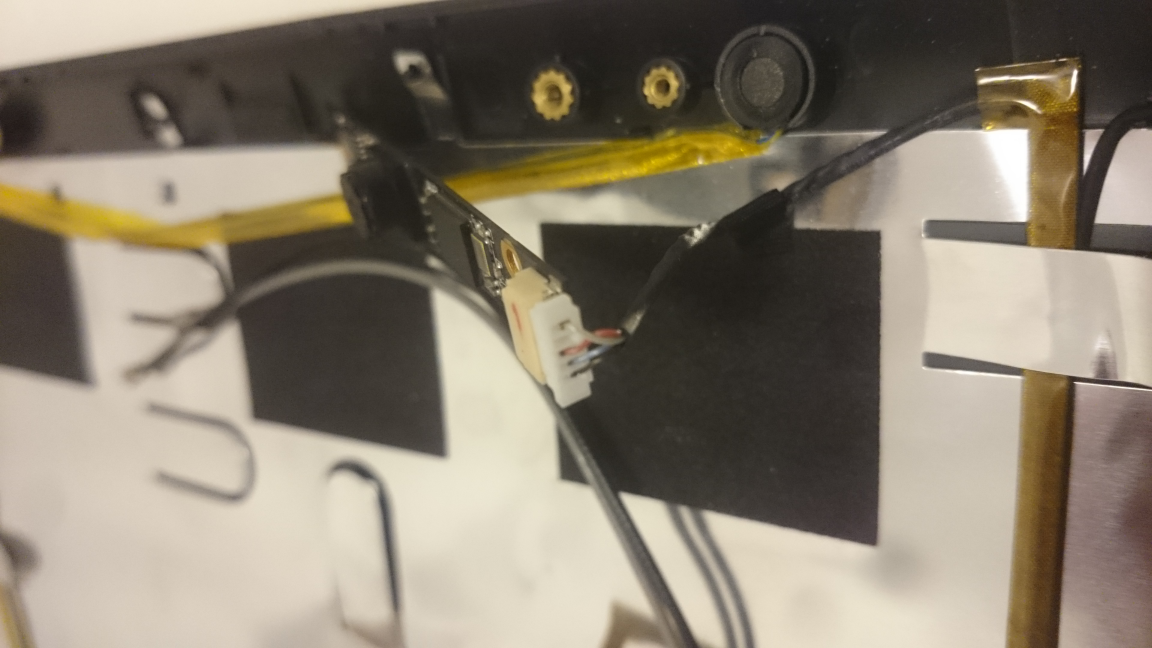
STEP 2: THE WIRES
Your laptop can have different wire colors. Please google your webcams serial number to check what is what.
My wires & connection:
| USB cable | AMS1117 regulator | Camera |
| Black (GND) | –>5.0V ->regulator-> 3.3V –> | Silver/White |
| Red (V+) | –>5.0V ->regulator-> 3.3V –> | Red |
| White (D-) | —-> | Blue |
| Green (D+) | —-> | Black |
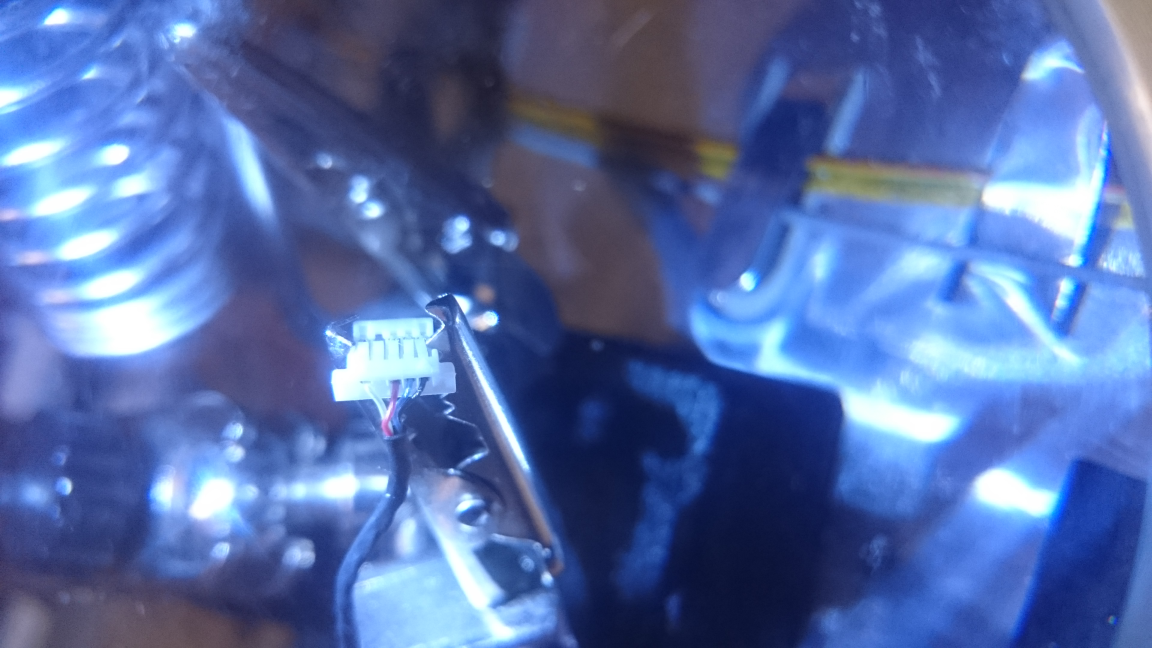
STEP 3: CAMERA Connector
Tools:
– razor blade
– magnifying glass
– tweezers
As a 1st please make a photo of the connector from laptop camera! This is just in case you forgot which cable was were, so just to be sure… Then take razor blade, magnifying glass and tweezers and carefully pull out old cables from the connector. Then do the same for new set of cables. Once you have the cables in the old connector, you can connect the camera with the new cables, add the regulator and other – data – cables. You can of course take the razor blade and cutoff the old cable. I’ve done this (old connector – new cables) to safe the old cable, and really the new set of cables is more or less zero costs.

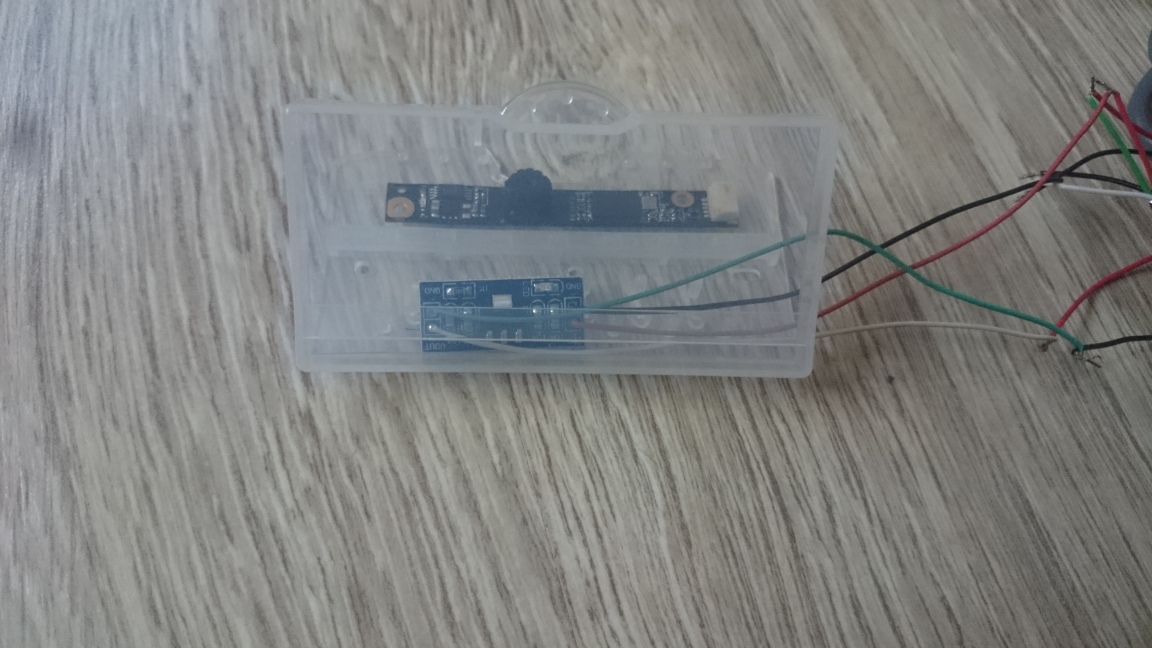
STEP 4: Step down power supply module
Tools:
– soldering iron
The power supply I bought does not have any cables soldered. So this part was totally up to me.
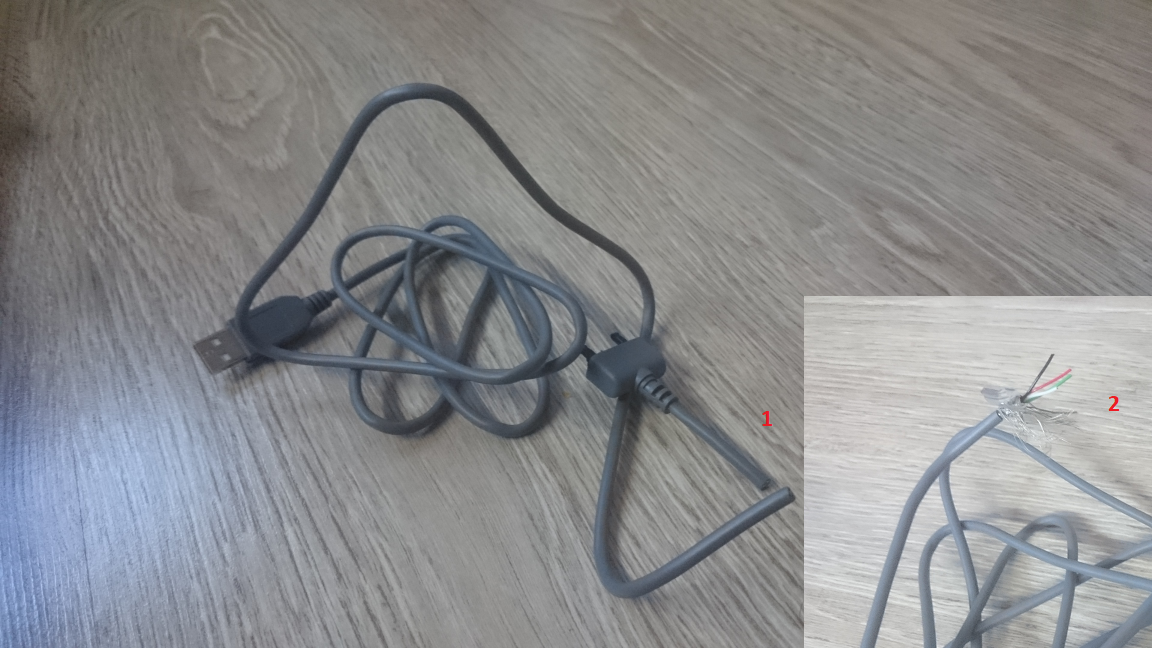
STEP 5: USB Cable
I’ve used old USB A Cable lying around, but you can also buy it – it’s really cheap. Mine was about 1 meter long – which is really enough. So.. I’ve cut of the other side of the USB cable which is not required and make some space for cables to solder them!
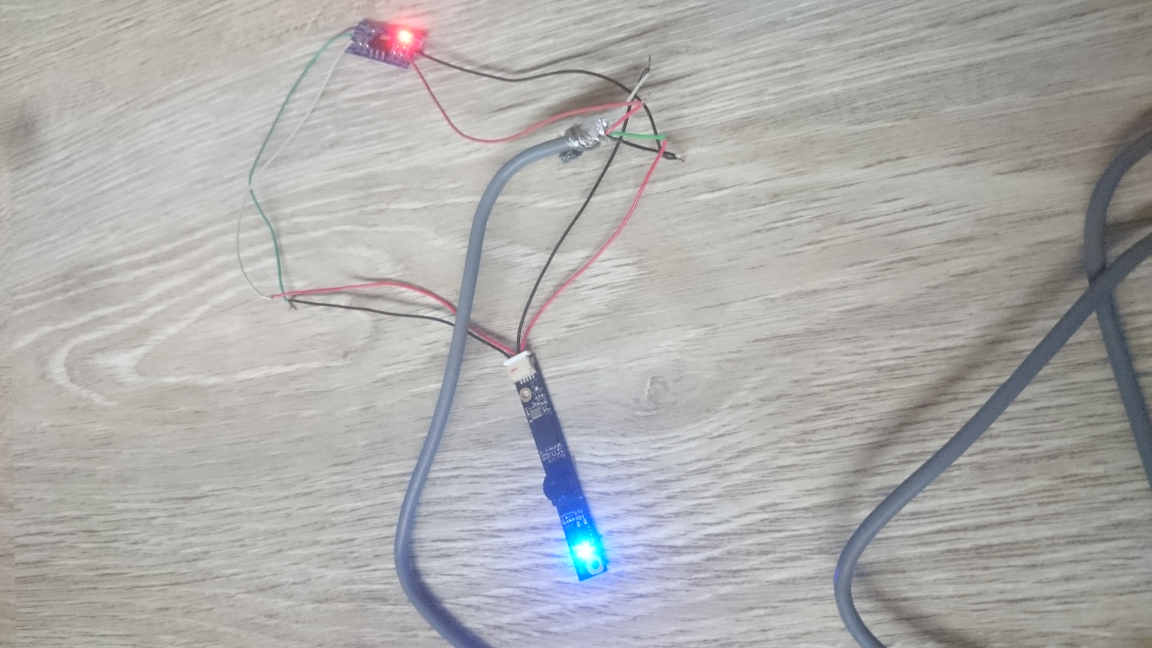
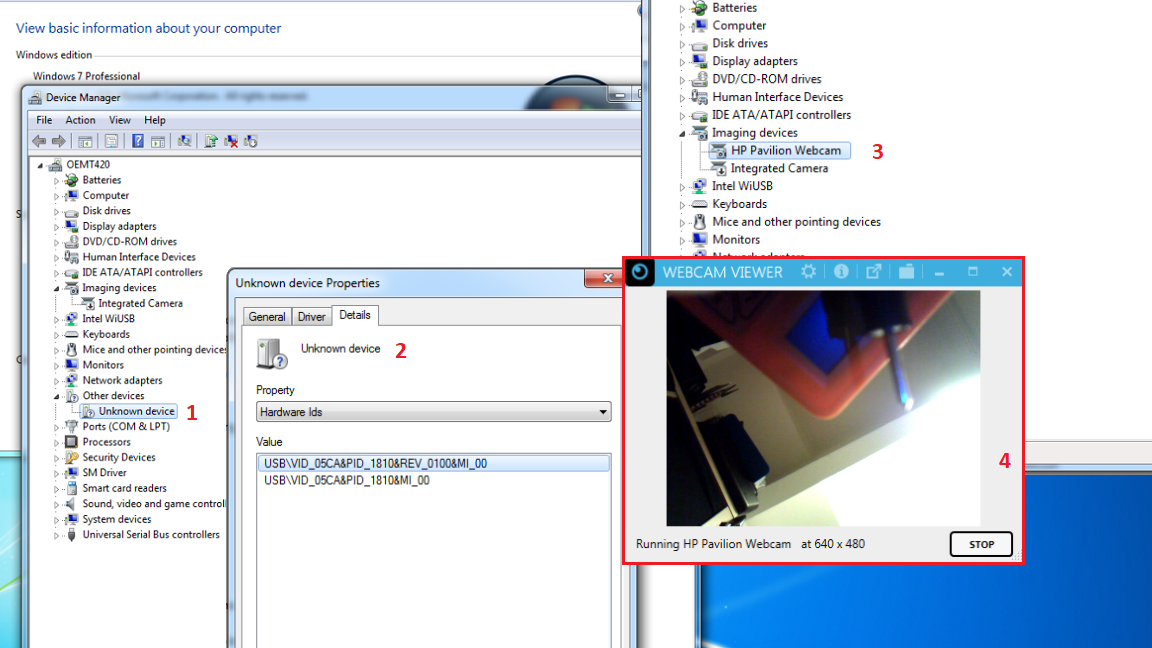
STEP 6: TEST
Now how to test your webcam? Under Windows Vista, 7 or 10 there is not some handy software, that you can test the cam with. You can use Skype or any other tool, but you can check also below nice program.
More on links from bustatech.com: WebcamViewer 1.0 or more recent version WebcamViewer 3.5.
The driver was not a problem for me, as Windows 7 found it easily over automatic MS update.
UPDATE: I’ve also tested this cam with Windows 10 .. Working nicely 🙂
STEP 7: FANCY BOX
Tools:
– hot glue gun
I’ve used an empty holder for batteries, found in local store, more or less for free..
AND FINAL PRODUCT AGAIN:
ReSOURCES/OTHER SITES:
Transform a Laptop Camera into a USB web cam
Salvaging and Reusing an Old Laptop Camera to USB Camera
Reuse Old Laptop Webcam
Turn an old laptop into a CCTV camera
Notebook Webcams auf USB umrüsten und am Desktop-PC weiterverwenden
WEBCAM drivers – WEBCAM PROBLEM SOLVED!!
Hope you like this DIY instructable 🙂